Christmas Trees in WPF using FSharp.ViewModule
As my contribution to the F# Advent Calendar this year, I thought I’d write a bit about one approach I often use to create WPF user interfaces in a functional style – mixing MailboxProcessor with FSharp.ViewModule.
This post will illustrate using a pair of MailboxProcessor instances mixed with FSharp.ViewModule to construct a simple application.  In the spirit of F# Advent, our application will be a small drawing application that allows us to place and decorate Christmas trees.
In order to start, we need a way to represent a collection of trees. For this application, I’ve created a simple model, comprised of Tree and Forest records, with some functions for manipulating a Forest:
In addition, I have a ForestManager module, which provides a mechanism to use MailboxProcessor to provide updates to a Forest.  Discriminated unions provide the mechanisms for specifying an update and receiving a result.  In our case, an update can be adding a new tree to a forest, or decorating an existing tree within a forest.  As the entire Forest is immutable, either of these would need to create a new Forest.
In order to request updates, as well as update our view, I’m using two MailboxProcessors.  Our view creates a MailboxProcessor<ForestUpdateResult>, which is will use to receive notifications of new Forests.  The ForestManager has a single function which accepts this processor, and creates a secondary one which can be used to post updates.  A single processor would work using PostAndReply, but the advantage of having two is that the model can request updates independently of the view layers, and all user events that require an update just post to a MailboxProcessor, which simplifies the view dramatically.
The manager effectively just delegates the update requests to the Forest functions, and posts to the view’s Mailbox whenever an update needs to occur:
While this is simple, in a more complicated application, the “manager” within the Model layer can very easily add more updates triggered by external sources, which provides one advantage of having separate MailboxProcessors instead of using a single processor via PostAndReply.
Now that we have our Model layer defined, we need a way to interact with this from the View.  This is where FSharp.ViewModule comes into play.  For this application, my view model uses EventViewModelBase from FSharp.ViewModule. This allows us to react to user input as a stream of strongly typed events.
The first thing we’ll need is to create our ViewModel and view Event types, and define a single property and backing field for the Forest we’re viewing.
This allows the current Forest, defaulting to an empty forest, to be bound by our view.  All of the INotifyPropertyChanged plumbing gets handled internally by FSharp.ViewModule’s base classes for us.
Next, we need to create our MailboxProcessors.  First, we need one that we can listen to in order to receive updates to our Forest.  Once that’s created, we can request one to post updates to from the ForestManager module.  Note that I’m capturing the SynchronizationContext and handling it within the agent – in this case, that’s actually unnecessary, but it makes the updates fully threadsafe with WPF if our Model were to post updates from multiple threads, even if we decided to change how we work with the Forest (such as keeping an ObservableCollection for history, which would require synchronization).
The reporter MailBoxProcessor we create listens for updates, and updates our current forest whenever an update occurs. Â We can handle different types if we wanted to post status updates to the user (which I’m currently not doing), and easily extend this to other types of updates or errors as needed.
We pass the reporter to the Manager to create a second MailboxProcessor: updateAgent.  This will be then used within our event stream, and allow us to post update requests back to the Model.  Each user event maps to one update request, and, from the ViewModel perspective, requests are completely decoupled from the updates to display back to the user:
Once this is done, all of the logic for our program is complete.  All that’s left is to wire up a user interface.  FsXaml provides some helpers which can be used to convert EventArgs into our TreeEvent discriminated union, so we create two converters, and use them via EventToCommand behaviors to push mouse clicks into our ViewModel.
The key portion is line 12 and 23 – by using our converter, we can map a MouseEventArgs instance when the user clicks into our strongly typed event, and route that directly to our VM.
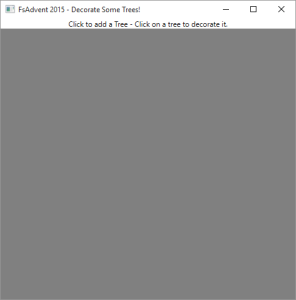
Once that’s done, if we run, we see:
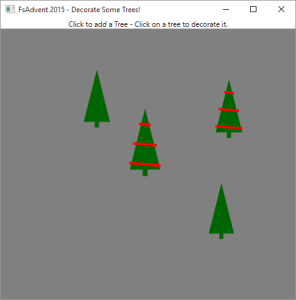
Clicking in the window should add a tree – and clicking on a tree will “decorate” it:
Once we get more than 10 trees, adding another will prune the forest and remove trees, which illustrates how events separate from the UI automatically populate through to the user interface automatically.
All of the source code is available on GitHub at https://github.com/ReedCopsey/AdventTrees.  Please download, try it out, and enjoy!
And remember to enjoy the rest of the F#-rich goodness that is the 2015 F# Advent!


Hi Reed, would the use of “Async.AwaitObservable” be applicable here?
Jay,
I think you could write it using that, but it’s not part of the F# core library (it’s in FSharpX.Async), which would have meant bringing in another dependency.
-Reed
I see…thanks for this example, it brings together several aspects of F# very clearly.